タイトルシーン
-
tnantoka
- 2013年11月14日
今回は軽いお題で、タイトル画面を作ります。
リリース時には凝った演出があった方がよいかもしれませんが、現状ではタイトルとボタンを並べるだけです。
ボタンはSJTapNodeというクラスで表現しています。
touchesEnded:withEvent:が発生した時にdisabledじゃなければ、targetのactionを呼び出す単純なNodeです。
なお、タップ中やdisabled時はcolorBlendFactorを操作してグレーになるようにしています。
SJTapNode
- (id)initWithFontNamed:(NSString *)fontName {
    if (self = [super initWithFontNamed:fontName]) {
        self.color = [SKColor grayColor];
        self.userInteractionEnabled = YES;
    }
    return self;
}

- (void)touchesBegan:(NSSet *)touches withEvent:(UIEvent *)event {
    if (_disabled) return;

    self.colorBlendFactor = BLEND_SELECTED;
}

- (void)touchesCancelled:(NSSet *)touches withEvent:(UIEvent *)event {
    if (_disabled) return;

    self.colorBlendFactor = BLEND_NORMAL;
}

- (void)touchesEnded:(NSSet *)touches withEvent:(UIEvent *)event {
    if (_disabled) return;

    if (_target && [_target respondsToSelector:_action]) {
        [_target performSelector:_action withObject:nil afterDelay:0];
    }

    [self touchesCancelled:touches withEvent:event];
}

- (void)setDisabled:(BOOL)disabled {
    _disabled = disabled;
    self.colorBlendFactor = _disabled ? BLEND_DISABLED : BLEND_NORMAL;
}
これを以下のようにSJTitleSceneで利用しています。 今は、ボタンをクリックしてもNSLogされるだけです。
- (void)createSceneContents {

    // Title
    SKLabelNode *titleLabel1 = [SKLabelNode labelNodeWithFontNamed:@"Mosamosa"];
    titleLabel1.text = @"Prototype";
    titleLabel1.fontSize = 28.0f;
    titleLabel1.position = CGPointMake(CGRectGetMidX(self.frame), CGRectGetMaxY(self.frame) - 80.0f);
    [self addChild:titleLabel1];

    SKLabelNode *titleLabel2 = [SKLabelNode labelNodeWithFontNamed:titleLabel1.fontName];
    titleLabel2.text = @"Quest";
    titleLabel2.position = CGPointMake(CGRectGetMidX(self.frame), titleLabel1.position.y - titleLabel1.frame.size.height - MARGIN);
    titleLabel2.fontSize = titleLabel1.fontSize;
    [self addChild:titleLabel2];

    // New game
    SJTapNode *newNode = [SJTapNode labelNodeWithFontNamed:@""];
    newNode.text = NSLocalizedString(@"New Game", nil);
    newNode.fontSize = 20.0f;
    newNode.position = CGPointMake(CGRectGetMidX(self.frame), CGRectGetMidY(self.frame) - 0.0f);
    newNode.target = self;
    newNode.action = @selector(goNew);
    [self addChild:newNode];

    // Continue
    SJTapNode *continueNode = [SJTapNode labelNodeWithFontNamed:newNode.fontName];
    continueNode.text = NSLocalizedString(@"Continue", nil);
    continueNode.fontSize = newNode.fontSize;
    continueNode.position = CGPointMake(CGRectGetMidX(self.frame), newNode.position.y - newNode.frame.size.height - MARGIN);
    continueNode.target = self;
    continueNode.action = @selector(goContinue);
    continueNode.disabled = YES;
    [self addChild:continueNode];

    // Settings
    SJTapNode *settingsNode = [SJTapNode labelNodeWithFontNamed:newNode.fontName];
    settingsNode.text = NSLocalizedString(@"Settings", nil);
    settingsNode.fontSize = newNode.fontSize;
    settingsNode.position = CGPointMake(CGRectGetMidX(self.frame), continueNode.position.y - newNode.frame.size.height - MARGIN);
    settingsNode.target = self;
    settingsNode.action = @selector(goSettings);
    [self addChild:settingsNode];

    // Copyright
    SJTapNode *copyrightNode = [SJTapNode labelNodeWithFontNamed:newNode.fontName];
    copyrightNode.text = NSLocalizedString(@"© 2013 SpriteKit.jp", nil);
    copyrightNode.fontSize = 12.0f;
    copyrightNode.position = CGPointMake(CGRectGetMidX(self.frame), 40.0f);
    copyrightNode.target = self;
    copyrightNode.action = @selector(goCopyright);
    [self addChild:copyrightNode];

}

- (void)goNew {
    NSLog(@"New");
}

- (void)goContinue {
    NSLog(@"Continue");
}

- (void)goSettings {
    NSLog(@"Settings");
}

- (void)goCopyright {
    NSLog(@"Copyright");
}
ごく単純ですが、これでタイトル画面が表示されます。
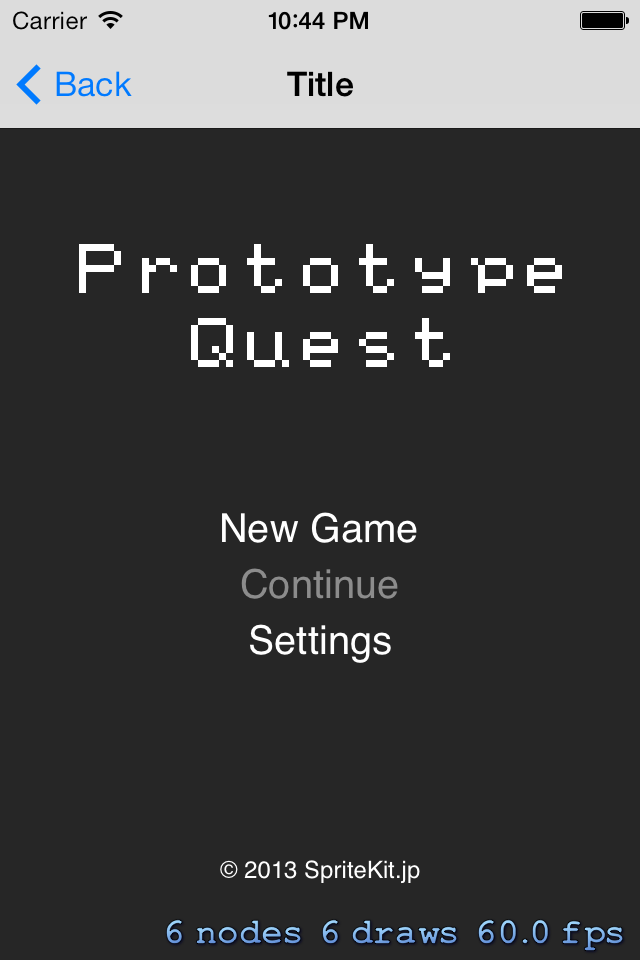
質素な画面
次は設定画面を作ります。
ソースコード: sj-prototype-apps/SJRolePlaying at master · tnantoka/sj-prototype-apps
comments powered by Disqus
